


Preparedness comes in all different forms. It can mean having an emergency kit in your vehicle in case it breaks down or having a go-bag/bugout bag ready should you need to leave an unsafe area quickly. However, it can also apply to less immediate threats such as learning simple cooking recipes.
That’s right, I’m going to be putting on my chef’s apron today and sharing a super simple recipe that doesn’t require much time at all. In this post, I will be showing you how I make homemade crackers. If you don’t have a lot of skills in the kitchen then let me put your worries to rest because if I can make this recipe, you can too.
What Do Crackers Have To Do With Preparedness?
Right about now, you may be asking what this has to do with preparedness. Well, as we have all seen in recent times, products are not always available when we want or need them. And unfortunately, this has applied to essential items like food.
Even during tough times, the recipe I will be sharing is easy to make because it only requires two ingredients, both of which are widely available.
Crackers also go well with an assortment of meals, making them a versatile food item to have. Lastly, these crackers have a pretty good shelf life of at least a couple of weeks when stored in an airtight container.
Making Crackers
What You Will Need
- All-purpose flour (feel free to substitute for flour that you prefer)
- Water
- Salt (optional)
- Measuring cups
- Rolling Pin
- Oven
- Fork
- Spatula
- Cookie sheet or pan
- Mixing bowl
- Pizza cutter (any cutting utensil will work)

As you can tell, not much is really needed for this recipe, and I will discuss a few things that can be substituted or not even needed in a section after the following steps.
Step 1
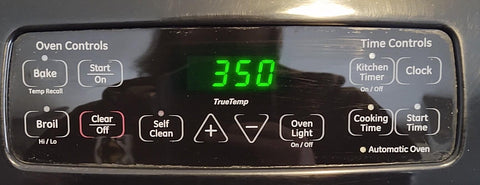
Turn the oven to 350 degrees.

Step 2
Measure out one cup of flour and dump that into a mixing bowl.

Step 3
Slowly add water into the flour and mix with a fork or your hands. A fork will make it easier at first because the flour will be very sticky at the beginning of the mixing process.
Keep adding water slowly until the flour turns into a non-sticky dough that is similar to Play-Doh. If the flour has too much liquid then add more flour. If the dough is sticky then add more flour. Just remember to have patience and add these ingredients in small amounts.

Step 4
Sprinkle some flour onto the countertop. Now, place the dough onto the counter and sprinkle some flour onto it. I don’t like to use the entire ball of dough at once but instead, I will cut smaller portions of dough off at a time to work with.
The extra flour will help to keep the dough from sticking to the countertop and the rolling pin.
Step 5
Use the rolling pin to spread the dough into a layer as thin as possible without causing the dough to tear apart.

Step 6
Take your cutting utensil to cut the dough into the size and shape that you want the crackers to be. I don’t concern myself too much with this step and zip the pizza right through the dough.


Step 7
Take the fork and poke several holes into the dough. This helps to keep the crackers from puffing up while they bake.

Step 8
Place the crackers onto a cookie sheet, leaving a little bit of space between them, and put the cookie sheet into the oven. The cooking time will vary depending on the thickness of the dough but it is usually around 10-15 minutes.

Step 9
Once the crackers have browned on top, they are done. Scoop them up with a spatula and set them off to the side to cool. Once they are cool put them into an airtight container and they should last a few weeks.
Substitutes
I thought I would briefly circle back to the “what you will need section” and provide a few alternatives.
- A rolling pin makes this process much easier but if you do not have one, that is okay. The dough can be spread out with your hands, a water bottle, or even a round drinking glass. Out of these three options, I would recommend the water bottle. Using your hands will take a while and a drinking glass can pose a real safety risk.
- A spatula is nice to have for removing the finished crackers but I have found that the crackers don’t tend to stick to the pan so this can be done without that tool.
- You can use any tool you want for mixing the dough and the mixing doesn’t have to be done in a bowl but can be done directly on a countertop.
- As I mentioned you do not need a pizza cutter to cut the cracker shapes. A sharp knife and sometimes even a butter knife will work. You also do not need a fork for poking holes into the dough, a simple toothpick will do the same thing, but a fork makes the process go faster.
Conclusion
This recipe is essentially the same recipe for making hardtack, which if you don’t know is basically a biscuit that lasts an extremely long time. Hardtack is much thicker and dense; therefore, it requires that it be soaked in a liquid to soften it before eating.
By using the same recipe but making the dough much thinner, crackers are created, and the soaking process can be eliminated. This is why it is so important to roll the dough into a layer that is as thin as possible. A cracker made with this recipe that resembles the thickness of a store-bought cracker will be surprisingly hard on the teeth.
As I mentioned earlier this recipe can be completed with just water and flour, but I sometimes will add a bit of salt to it for two reasons. One reason is that it will give the crackers a little more flavor and the second reason is that the salt will help to preserve the crackers. The low moisture content of this cracker combined with some salt will give you a crunchy snack that is shelf-stable and can be combined with many different types of meals.
Thanks for reading and I hope you enjoyed this incredibly simple yet satisfying cracker recipe. If you have any thoughts or questions about making homemade crackers feel free to leave a comment below.
ABOUT THE AUTHOR
Bryan grew up in the Midwest and spent every waking moment outdoors. Learning how to hunt, fish, read the land, and be self-reliant was part of everyday life. Eventually, he combined his passions for the outdoors, emergency preparedness, and writing. Bryan is a published author with Fox Chapel Publishing. In 2019, Bryan authored the book, Swiss Army Knife Camping and Outdoor Survival Guide. In March 2021, he released his second book, Paracord Projects For Camping and Outdoor Survival.